Boutique Bow

 |
| Cut ribbon to desired length. I cut mine to 22". |
 |
| Wrap ribbon around end to end. You will have two loops on each end, and stop with the end hanging down. |
 |
| Stick a straight pin in the middle, and fold ribbon over, to make sure that it is even. |
|
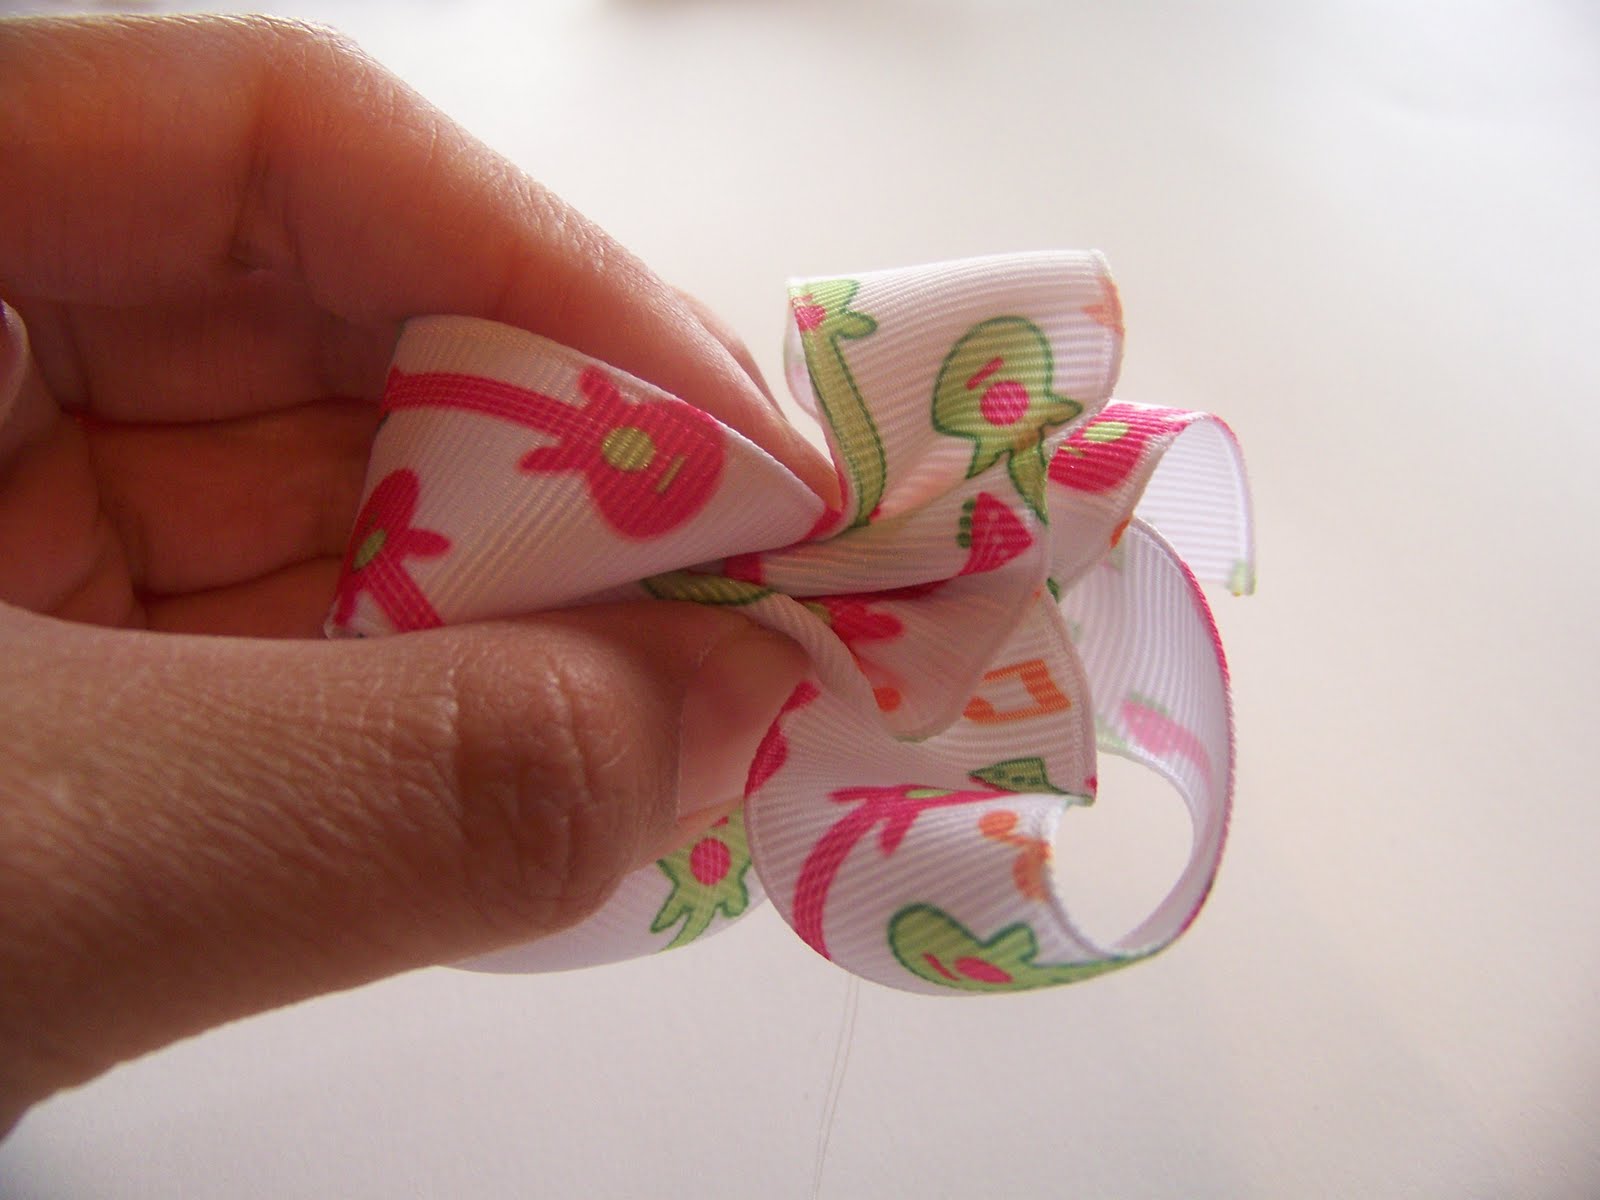
| Holding the ribbon, begin separating the loops. Your bottom end will go to the right, you top end will go to the left. |
 |
| Continue to open it up, and shape how you want it to look. |
 |
| Be sure to keep the back ribbon going in a straight line, to ensure that your bow is even. |
 |
| Using a needle and thread (I double my thread) sew up the center of the bow, removing the straight pin. |
 |
| Pull thread all the way through, pinching the center of the bow. |
 |
| Wrap thread around center several times and tie off. |
 |
| Cut and heat seal your ends. |
 |
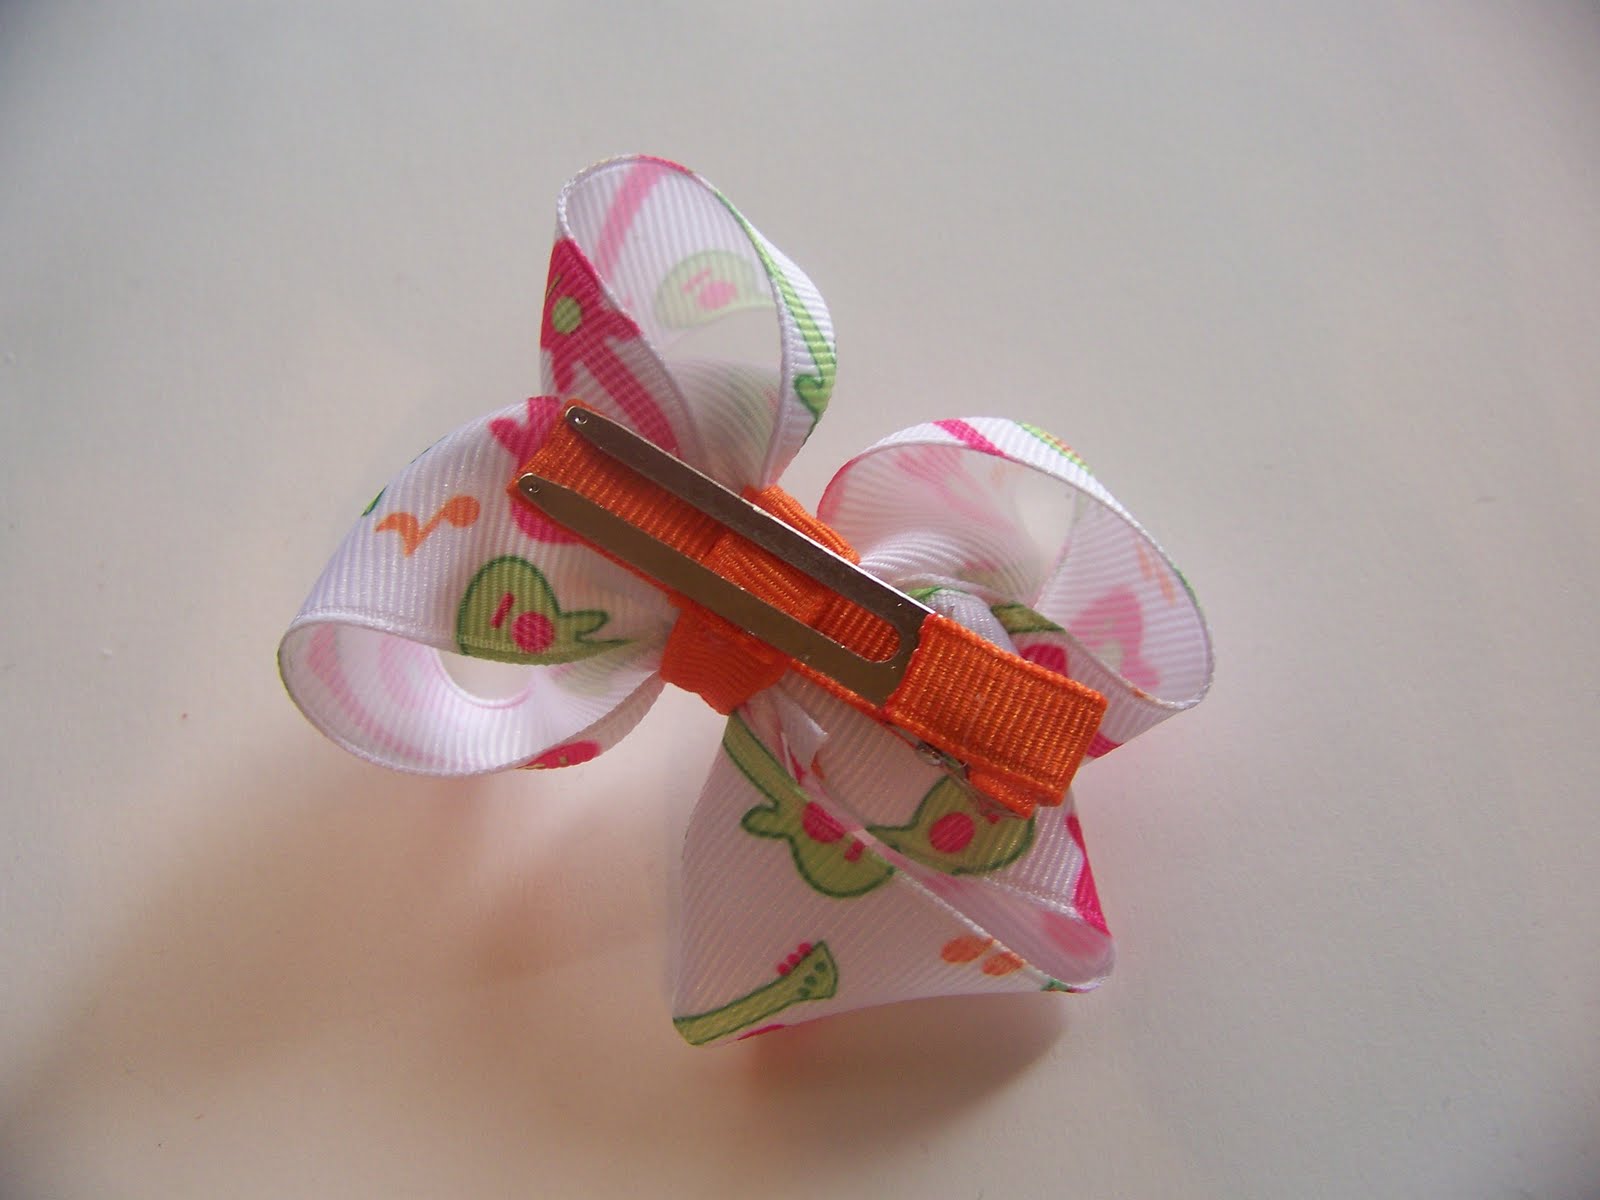
| Your bow will look something like this. |
 |
| Fluff up your bow, to make it all even. (not shown here, but I will then spray the bow with heavy starch and let it dry. This will help it to keep it's shape.) |
 |
| Tie your knot center with 3/8" ribbon. |
 |
| Line your clip of choice. |
 |
| Glue clip to back of bow. |
 | ||
| Wrap you center pieces around, glue, cut and heat seal. |
|
| Spray finished bow one more time. Let dry. This tutorial belongs to BOWtiful Bows Boutique. Please do not sell, or claim as your own. Re-posting is allowed, but only by linking to this post. Thank you. |